Wood, Parts of Wood and Splitting
You may have noticed that some of the chairs used as illustrations so far have bits of bark left on them. I did this on the comb of my first chair and it has become a noticeable feature on most of the chairs since. Time will tell about the longevity of the bark feature, but it raises the issue of the woods and parts of wood to use in your chairs. Again it is not the intent of this pamphlet to compete with other advice. I just want to tell you what I have learned from experience. Ash, in particular, is such a wonderful, precious resource that some knowledge of wood can help you make the best of it, wasting as little as possible. Having worked New Zealand woods, I can testify that there is no comparison with Ash.
Working from the inside of the log, the sections of wood usually highlighted are the heartwood, then the sapwood, then the cambium layer, live bark or bast and dead bark. Wisdom varies and wood species are all slightly different but the part favoured for most chair parts is the sapwood. Indeed within a reasonable sized log you will often see two distinct layers of sapwood the inner of which is more compact as it slowly turns to heartwood. This inner sapwood layer is often still easily workable and seems to have good stability and strength. Received wisdom says that the nearer you get to the outside of the tree, the more susceptible it is to rot. In today’s dry, heated houses, this is less of a problem.
The first wonder of Ash is its ability to split cleanly. As you exert a splitting pressure, it doesn’t grab too strongly across the line of the grain, so you can end up with a split that almost looks as if it has been planed. The greener the wood and the straighter and tighter the grain, the more likely it seems to be that this clean splitting will happen. Inner sapwood is really good. The longer the log length, the more likely it is that the splitting forces will be diluted in comparison to the grab forces and then you tend to get ‘run-offs’ to one side and fibre fractures. You can use various techniques to try to control the split and that is one of the skills that you get from practice. Hopefully the sketch below illustrates that you can also split the wood from the inside to get more sticks from one segment of log. If you remover the inner, heartwood segment, then split roughly along the next arc outwards, you are left with two sections that can be split into three and two sticks. The outer section will often split better by laying it down and splitting from the middle of the bark side. Splitting it like this, from inside to outside, often helps control the split better too. If you get a piece of wood that has bent grain or a lot of grab, then you can often saw these smaller sections of log in two to get more controlled splitting for use as shorter sticks.
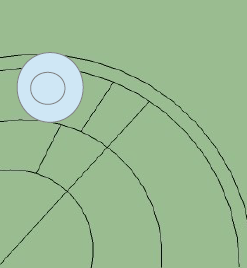
You can see that the three outer sticks marked for splitting in the above illustration will have bark on them, which you could try to preserve. There is actually the cambium, live bark (bast) and dead bark layers there and you can try to preserve any or all of those. You don’t want the outer layer on your tenons though. If you use a lathe to shape your stick, saving that bark layer is going to be harder and I have marked it on the diagram, together with a smaller circle for the tenon at the end of the stick to show that. In essence you have to offset your centres on the lathe, so that the bark gets skipped each time the stick turns. Using the same technique, keeping just the cambium layer is a bit easier. If you just shape the sticks with a draw knife, spokeshave and similar tools, you can make the stick more oval, which again makes it easier. Anyone who has split bark will know how easily it comes off, so you have to work with care. Once it is dried it seems to be stuck to the stick more firmly and with something like Danish Oil on, it seems completely stable. I don’t treat it with kid gloves once it has dried.
The next trick for getting the most out of the wood is to know when to give up for the moment or to move on to the next tool. The tools in sequence might be: splitting axe, side axe, draw knife, pole lathe, Drying, pole lathe, spokeshave, rounding tools. There is no fixed order or time to move from one to the other, but any problem the wood is giving you might be easier to solve with the next tool in the sequence. The first set of tools are all versions of splitting but a pole lathe shaves the wood in a different direction so will often help where the wood keeps trying to make your splitting tool dive in because of grain irregularities. Even then, it is worth remembering that we are using green wood because it splits and works more easily. That also means that the anomalies in the wood are harder to control. After it has dried, ash is so hard that I have made resilient jewellery out of thin slithers of it, cut from the ends of sticks. That means that finer adjustments are easier to make with good sharp tools after it has dried.
It is also worth remembering that grains run in a range of directions in any one piece of wood. As you look along your stick from the end, you may have a nice straight face, but the grain may have several different layers, as in the diagram below. You can detect this by the presence of lines running across the stick. If you pull your blade into the either of those stepped bits, it will try to lift the whole layer. Simply reversing your blade, so that you are sliding it from the end towards the step, will lessen the chances of lifting the layer. That means that you often have to swap direction from one part of the stick to another as the layers wave up and down.

While we are on this diagram, It is worth thinking forward to the process of bending. Essentially all wood looks like this leaf structure at a micro level, even after planing, because the grain is never completley straight. I think you can probably picture what tends to happen when you try to bend the wood. We’ll return to that later too.
Drying changes the nature of the wood. As it dries by evaporating moisture, the liquid parts, especially lignin, dehydrate and shrink. These liquids and the round structure of the log have been keeping the harder parts under tension in various ways and that tension is released. The result is a number of distortions. If you have made a round stick it will probably become slightly oval. If you split a board from your log it will try to bend from side to side. If the ends are allowed to dry too fast, the board will start splitting at the ends. Controlling these tendencies, and even using them, is part of the craft. For instance, you can put a dry tenon into a slightly wetter mortice and the joint may tighten as the mortice dries, but that depeds on the directions in which the board with the mortice shrinks If the mortice shrinks too much and the tenon is dry nad hard, the wood round the mortice may split. If the tenon is slightly wetter, it may come loose, as it shrinks further. If in doubt get a device to test the moisture levels so that different parts are in the equilibrium that you want. I feel like I can feel when wood is still too moist and hear the different sound dry wood makes when you bang two sticks together, but that is just hokum really.
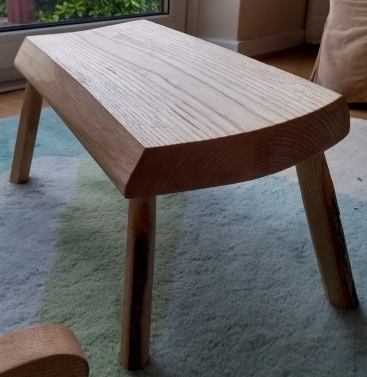
If you get a log and only use part of it, you can still use it later because it will take a while to dry out. You might be wise to do some splitting to release some of the tensions, reducing uncontrolled splitting, but exposing too much wood surface can speed up drying. The old trick of burying it in shavings helps. If it has dried a lot you can give it a soak in a rain barrel or trough and this will make it slightly easier to work again. Soaking is a last resort though, as the water does not properly rehydrate the wood structure, just sits in the gaps, loosens it up and makes it easier to work. It also introduces potential contaminants, so may change the colour of the wood a bit. One temptation, if you like the Welsh Stick chair look, is to use whole sticks without splitting. This is risky and takes a some care and you would be wise to make the sticks over long, so that any split ends can be cut off. You can also control drying a bit by sealing the ends of the wood, reducing evaporation from there and reducing the tendency to split. I have controlled bend in a split plank in this way too, by shaping it and putting Danish Oil on the side that will become concave and the ends, so that moisture goes first from the side that will become convex. You can see that in the footstool below made out of split ash, which still has a slight convex bend where the grain has tried to straighten out (cupping).
I made the bench seat, illustrated earlier, out of oak, that had been properly milled and stacked, but not for that long. It was nice and straight and carving the seat was like going through butter. I had to leave off finishing the seat till it had dried a bit though, as it tended to rag. Having removed wood in the carving and shaping, it started to dry and then split. We drilled a decent sized hole from the back, clamped the split together with some glue in and put a long screw in through the hole from the back to hold it together, then plugged the hole. After the seat was made it dried a bit more and started to develop more splits, so in with more glue, re-clamp and then put in some fencing staples from underneath. Glue and sawdust mixed is very useful. It seems stable now, but I have left the underneath unfinished, so it dries out from there and will keep an eye on it. If it splits more, I will find ways of holding it together and perhaps make more of a feature of the splits. The bench looks beautiful and full of character but it would have been easier if the board had been dried longer. Even so I would recommend you don’t just jettison wood because it isn’t perfect.
There are whole books on bending and steaming and some amazing videos on the internet, so I will just tell you my experience and personal theory. Ash is revered for its quality in bending too, so I would choose that as a starting point. You can bend it when it is green just by slowly putting it under strain in a vice with blocks at each end on one side and in the middle on the other side, or making a proper shaped former to go on either side of the piece. This way you will bend it, but it takes up a vice or clamp for all the time it takes to dry thoroughly. Even then it seems to tend to straighten up again gradually.
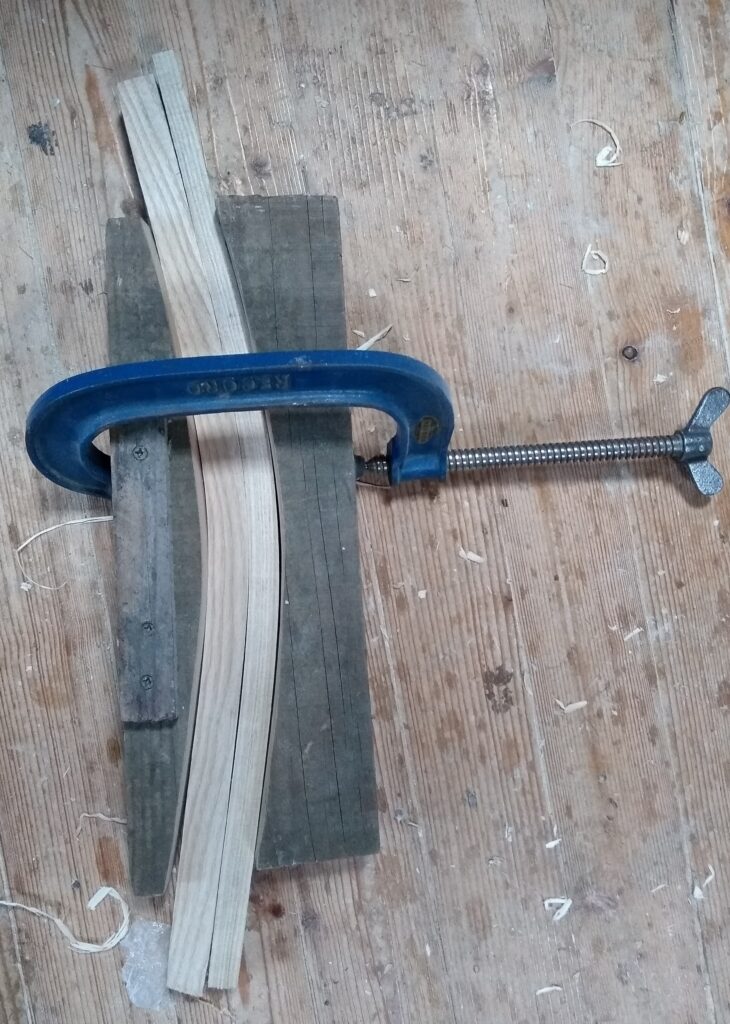
The alternative is to steam it. As far as I can tell the best wood for steaming is tight grained board that has been carefully dried and kept straight, usually by someone else. The moisture has been removed and the the lignin has dehydrated and other chemical changes have taken place. Before you steam the wood you soak it to take advantage of wood’s tendency to equalise moisture content. I don’t think this re-hydrates the lignin completely, just puts water into the structure that acts as a good heat transfer medium when you put it in the steamer, which softens the lignin and fibres so that the fibres will slide alongside each other and it can all be moved and shaped to create the bend. After you have taken it out of the steamer and bent it, the water leaves the wood faster than it would when it is green and so the bend seems to be more stable quicker. I have seen and had mixed results. Some pieces have just cracked despite my best efforts. Some have a greater tendency to fight you by trying to twist as they bend. Finally the stainless steel used to make compression straps seems hard to get in small quantities, so I used 25mmx.20mmx 3 meter CS95 High Carbon Steel strip and covered it in masking tape. This worked after a fashion but the steel is not really strong enough, so a thicker strip would be better. When you make a compression strap it is important to have a back on the strap beyond where the strap joins the handle/tension block that holds in the piece to be bent. If you don’t, the strap tends to pop off, which is stressful when trying to work fast and calm.
If you are bending a larger piece of wood, the forces required are greater. This can cause stress, even in very strong people, when it doesn’t work easily and the wood is cooling rapidly. Paul Hayden uses bottle jacks, which work well.
Another complication is if you want two bends in your wood as in the example below.
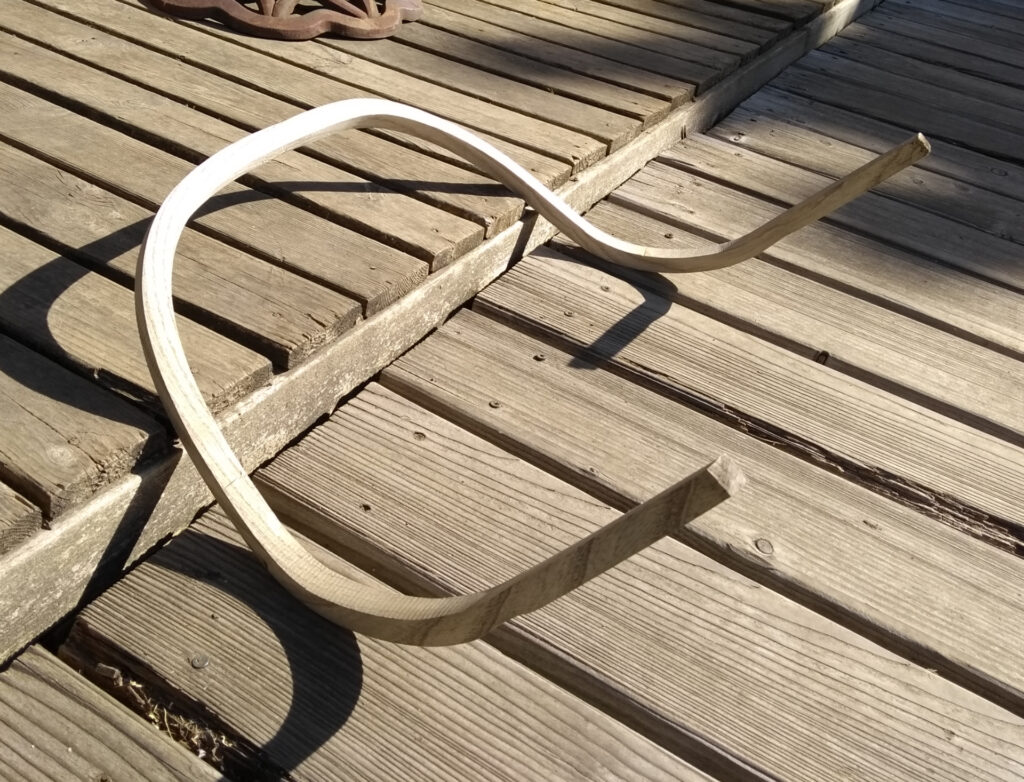
Making a former for a piece like that is complicated and doubles the risk of failure. You could bend it in two or three different bending processes, but it won’t fit in your pipe steamer after the first bend. I have done it, but I would recommend you seek out good expertise before trying it.
I built a steamer out of sewage pipe covered in some insulation and blockboard I had lying around, put a small length of pipe in the end and fed a pipe from a wallpaper stripper into it. I also put some sticks across the bottom of the pipe by drilling holes in either side and feeding the sticks through. This keeps the bits being steamed off the bottom. I just stand the steamer on saw benches, which makes it a smaller thing to hide in the garden when not in use.
Most Green Wood courses in the UK are in parts of the country where the best wood is available. Elsewhere, getting fresh, straight ash logs and other woods can be a problem. If you are near one, join in with a local Bodgers (APT&GW) group, who will know about sources. There isn’t one very near me. As mentioned earlier, drying and storing wood effectively is quite an art.
