Backs, Arms and Rockers
After making a three legged stool I ended up diving right in at the deep end in making a rocking chair with arms. I am still amazed that it didn’t all end in tears. That it didn’t is because of three things. First I am lucky enough to be able to see shapes and angles in my head. The second is that I am not a person who wants everything neat and perfect. Third is that I am pretty good at making it better when I mess up. Actually the real reason it didn’t go wrong is that I did it at Westonbirt with Paul and the team, watching me all the way.
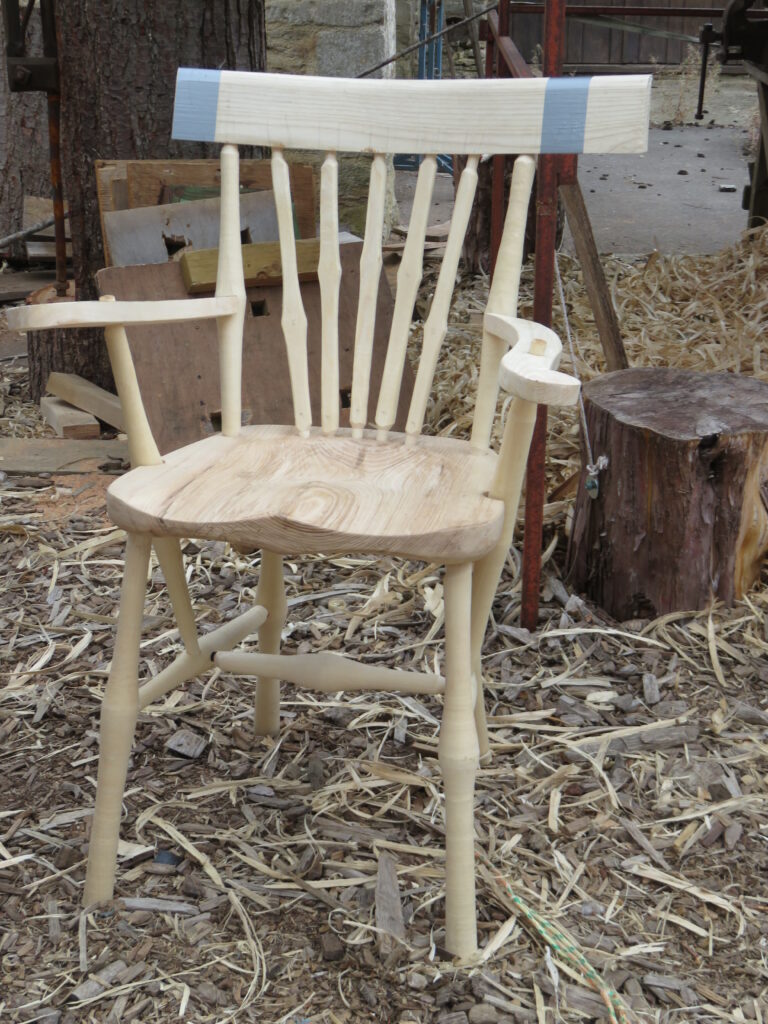
The three elements of this chapter title all add a significant level of complexity and can often work against each other as you try to frame the chair. If you put a straight forward comb with stiles or a bow back on, your sticks only need to fit the mortice hole size you have chosen at each end of the stick and you only need to get the mortice holes at the right angle and it will probably be acceptable. Paul Hayden has a neat way of adding arms to a ready made chair that is both strong and can be retro-fitted, but even this requires some extra thought and care in drilling the hole angles. This is shown under construction here:
Similarly you can make a chair and then add rockers, but attaching the rockers and getting the height and movement right requires a bit more understanding. This section outlines what I have learned.
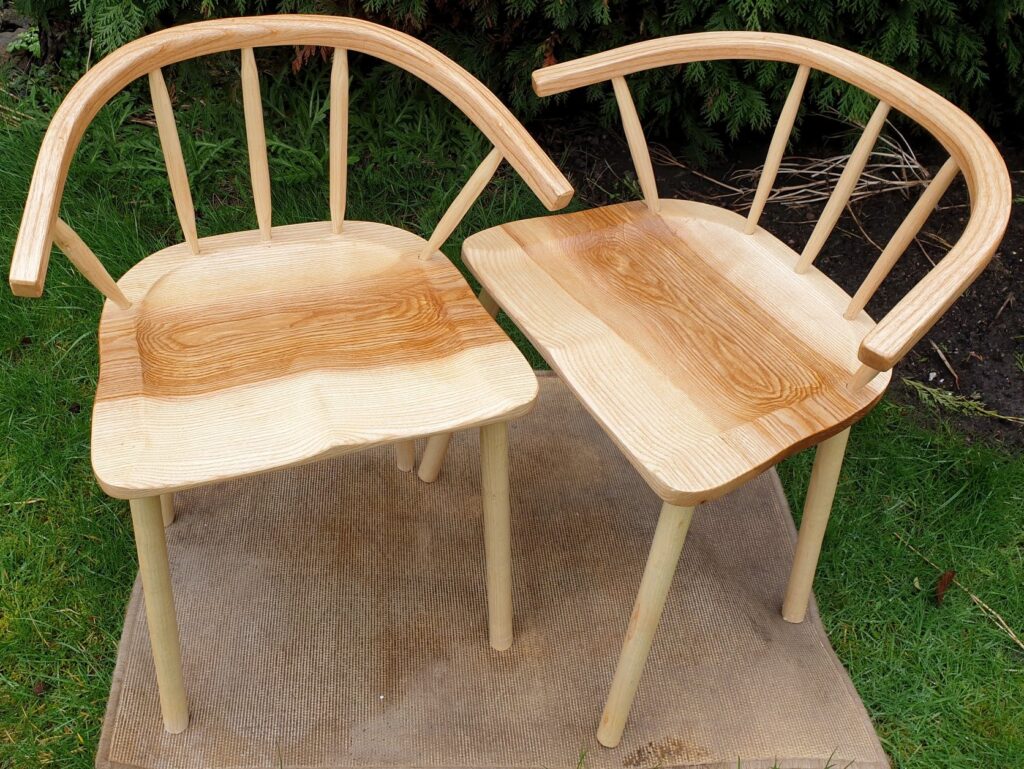
This picture is two dining chairs I designed and for a friend. It is about as minimal as you can get for a dining chair with arms. I made a prototype first to test out the design before making them and I am sat on it now, because it works well at my computer too. You could add more sticks and put the arm bow horizontally and it would still work reasonably well. I’ll go into the design principles in the next section, but this is the easiest way to add a back and arms. You need one bow and however many short sticks you require, with tenons at the end. With a horizontal arm bow, assuming you put the back sticks in at 101 degrees, then you just need holes at the same angle in the bow, though care is needed if the bow is not very wide or is over deep as the drill can emerge from the side rather than top or bottom.
You can do through tenons (that emerge on the top side of the arm and are usually pinned with a wedge) or hidden tenons, as above. I tend to use a mix as one works better when you push down on the arm and the other tends to work better when you pull up. If you taper the stick in towards the tenon, so that the arm sits on the point the taper starts, you get the supportive effect of a hidden tenon on a through tenon, but to do it properly you would also need a tapered mortice to match. That is harder to do though, especially over a whole series of sticks, with slight variations in tenon and mortice lengths. If you are drilling the arm from underneath for a hidden tenon, you have to remember that you are drilling from the inside of the curve towards the outside, which is the opposite of the seat or drilling from above, as you would with a through tenon.
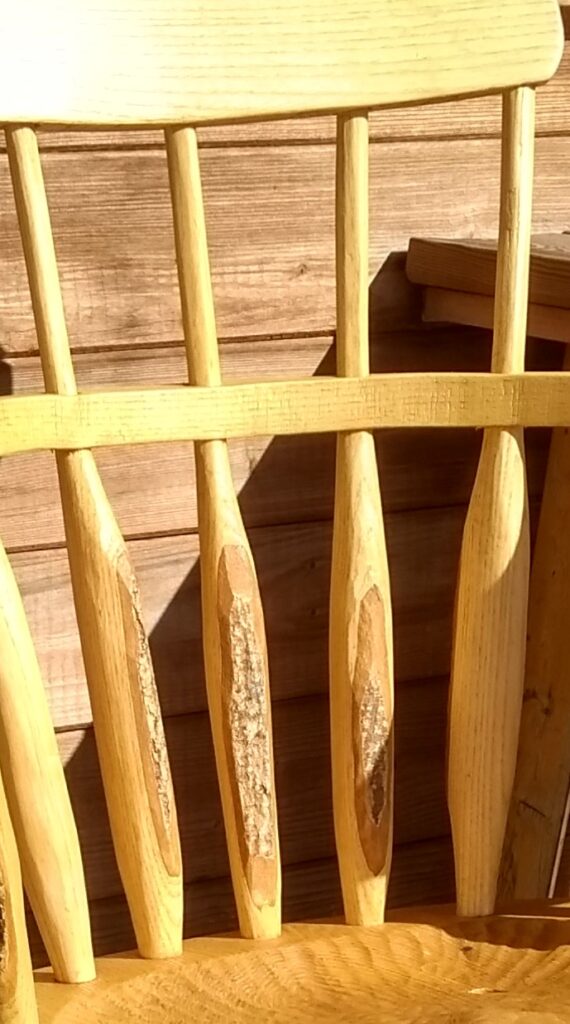
If you have through mortices in the arm, it might be tempting to try drilling through the arm bow on into the seat to ensure the same angle. I would recommend drilling the bow separately to the chair seat as it is hard to work out correctly and doesn’t allow for any flaring of the sticks. Drilling through also requires a very long drill, as it is best done when the arm is at the required distance from the seat. This best illustrated by this picture of back sticks going through the arm and up to the comb.
One reason for having a central stick at the back is that it can make setting everything else up easier. You drill your centre stick mortices place the arm on that stick and support it somehow at the front, then you can line up the other sticks and play around with placement and angles to work it all out. The sticks can attached to the arm bow by putting an elastic band round the stick, pulling round over the bow and then looping it back over the stick. This helps visualise it all, but you have to remember that it will all change a bit as the tenons sink in to the mortices in the seat and when you drill your holes in the centre of the arm bow, rather than the side, where you have attached the sticks with the elastic bands.
The arm sticks are ofte bit more complicated than the back sticks. It is rare that an arm bow has exactly the same flare as the seat. Usually the sticks are going to have to flare outwards from the seat more as they move to the front of the arm bow. The back sticks also move the arm bow slightly backwards, so that makes measurement more difficult. That is why doing a central back stick first is so useful. Even if you make your arm sticks vertical when looked at from the side, they are still going to flare out from the seat, which makes it complicated. With angles like the chairs above it is even more so. At this point I would say that, if you want to make a complicated chair, then go on Paul Hayden’s course, make a simple one first and then try a more complex one next time. Paul has T-shaped supports for the arms that you use after drilling the central back support to help work out the rest of the back and arm supports. If you want to work it out for yourself, I would recommend doing the front arm sticks first, so that you have a reasonably stable triangle with the central back stick, that you can use to plan and check the rest against. To give a rough measure you could put a square up from the seat where the centre stick is and measure the distance from the upright of the square to the front edge of the centre stick hole. This is how far back the bow has moved. On my first chair this distance was 4.5cm with the top of the arm bow 23.5cm above the seat. Assuming an upright stick, if you now decide where you want the front stick to enter the seat and measure the distance from that to the central back stick, you can first mark the equivalent spot on the other side of the seat, for symmetry again. You can then add the 4.5cm above to that distance and mark this new length in the same way, from the centre stick, on the bow. If the sticks are to be angled forward you need to add the extra distance that will create too. When you bend your arm bow it will often be longer than you need and probably slightly asymmetrical, so the fronts of the sticks are often unreliable as points to measure from.
The description above does not make designing and making a chair with an arm easy, but it does give some indication how hard it is. However you measure and drill your holes, you are likely to get a difference from one arm to the other. If you are an engineer and have the time, you can draw it all up and do the calculations. If you have a CAD system you could draw it all up and let the machine do the calculations for you. Most of the time you just have to devise a means of supporting the arms while you lay the stick pattern out, mark up positions and angles as well as you can, set your bevel to help you and then concentrate as you drill. As with the chair legs, it also helps to work out an angle and a direction. Set your bevel to match the desired stick angle and note where it is pointing. Then you have the two things you can keep in mind while drilling the hole. The sloping drill platform shown earlier also helps, as you can put the seat on it pointing in the right angle direction and then match that with the bow.
The prototype I am sitting on has two small plugs in the seat where I got the holes for the front arm sticks a bit wrong. The downward sloping arm makes working everything out even more complicated as the mortice in the arm is at a different angle to the one in the seat. Since the first chair I have also always tried to make the holes in the arms for that front stick slightly forward of where they should be, so that everything is under tension to resist the backward force created from leaning on the back. If the chair can be made so that it is reasonably robust just by mechanical force, then it will be even more so when glued. In this chair the effect of putting the holes slightly forward was to pull the back slightly forward too. Because the back of a dining chair usually needs to be sightly more upright in the first place this is more noticeable. I say noticeable but it is only me that has noticed and the final chairs didn’t have the same problem.
If you are making a chair with an arm bow and a comb back as well, or a double bow chair, then you have the added complexity that the back sticks have to be made so that they can go through the arm bow and up into the top of the back. The extra length also increases the backward forces a bit, which in turn puts a greater upward force on the arm ends. Despite these extra things to think about, the fitting of the arm bow is the key to stability and comfort, so I would recommend that you work this out first. If you want some outward flare on the back sticks, you can usually achieve this from the arm upwards, as the thinner sticks will have some ability to bend. This means that you can drill all the mortices in the seat and arm bow at the same angle, pointing directly forward and the same distance from each other and from the seat back or line of the bow.
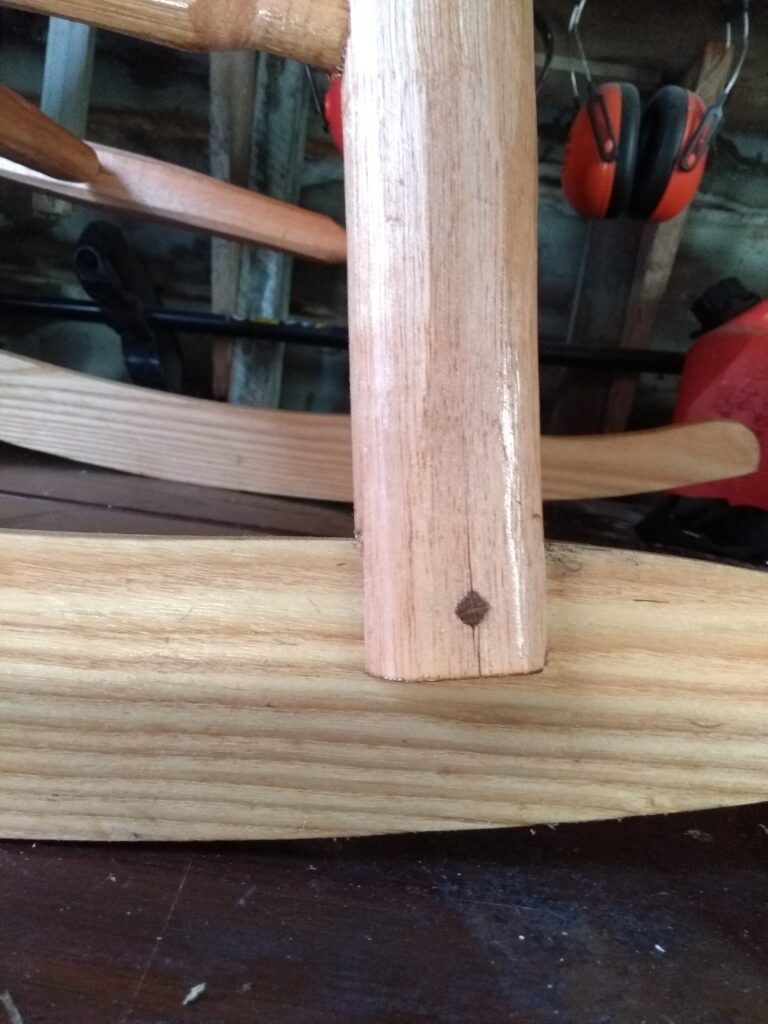
I have already explained that rockers help in stabilising the legs and that when you press downwards on one pair of legs to rock the chair, the rockers exert an upward force on the other pair of legs. This means that the join between leg and rocker is under less strain than you might imagine. The joint still needs to be strong though and you have to take into account the angles involved. You really want to have the rockers sitting flat on the floor, so the legs need to hit the top of the rocker as if they too were sitting flat on the floor. This means that the mortices in the rockers have to be angled from the inside of the rocker towards the outside and toward the front or back at the same compound angle as the leg. The curve of the rocker makes this harder still to calculate or envisage. You can’t have over-long tenons or they risk coming out of the side of the rocker. If you are daft enough to make a leg like the one on the front of this pamphlet, then you have to hide the tenon inside the perimeter of the leg and cut the bottom of the leg to match an angled, curved profile. After carving the tenons out of the leg on my first chair, I decided not to do that again, so I now drill matching holes in leg and rocker and fit a dowel tenon to join them.
Because the mortices in the rockers point outwards, it means that when you put the legs in, the effect is to pull the legs outwards, which is the opposite of the effect when the legs are inserted into the seat and the opposite of what you want for joint resilience. For this reason care is needed placing the mortices. My dowel method means that the holes in legs and rockers naturally start in the same place. If you are not using that method, you need to ensure that the holes in the rockers are the same width apart as the top of the tenons on the leg. When you are assembling the chair you need to put the legs onto the rockers before you put them into the seat so that you widen them then close them up again.
Sitting the legs on rockers raises them, so you have to shorten the legs to accommodate this. When you sit on the chair it is nice if it rocks back slightly into a new equilibrium with your weight on it. This raises the front of the seat slightly and, at this new height, your legs need to be at a comfortable enough height and angle to enable you to rock easily. The slight lay back as you sit also makes the seat angle more relaxed, so it doesn’t need to be too laid back in the first place. You need to be able to rock both forward and backward and placement of the legs near the front of the rocker and slight lay back on sitting make this happen nicely. As explained earlier the extra length of rocker at the back is to stop the chair tipping backwards with excessive rocking, mainly for when a small child stands on the seat, leans on the back and starts rocking a lot.
As well as being a little tricky to fit, traditional rockers are also quite hard to shape. You can cut them out of a larger piece of wood already curved or steam bend them. You can also fit rockers by making them much narrower and cutting a groove in the end of the leg to sit over the rocker, drilling a hole all the way through and filling it with a dowel. You can see this in the New Zealand chair below.
This works and has the advantages that the rockers are easier to cut and finish and that they have less floor area on hard floors. On soft floors they will tend to make a deeper groove.
Finally on rockers is the line of them on the floor. If you want the rockers to be parallel, you have to make the four leg ends describe a square pattern. If the legs are coming out at different angles front and back, this is not always straightforward. If you shorten the legs it will change the shape they make slightly. It is better to even out the chair on a flat surface before you start fitting to the rockers. It is generally fine if the rockers point in slightly towards the back, but any lack of symmetry will cause your chair to travel sideways as you rock.
