Tools, Making and Framing.
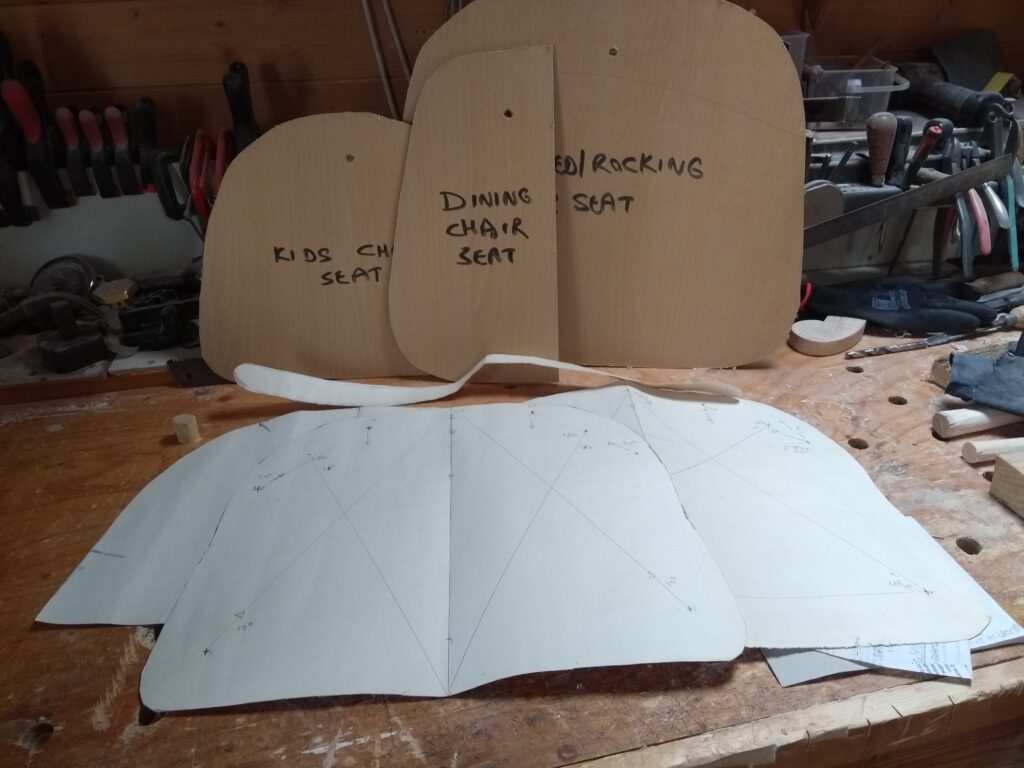
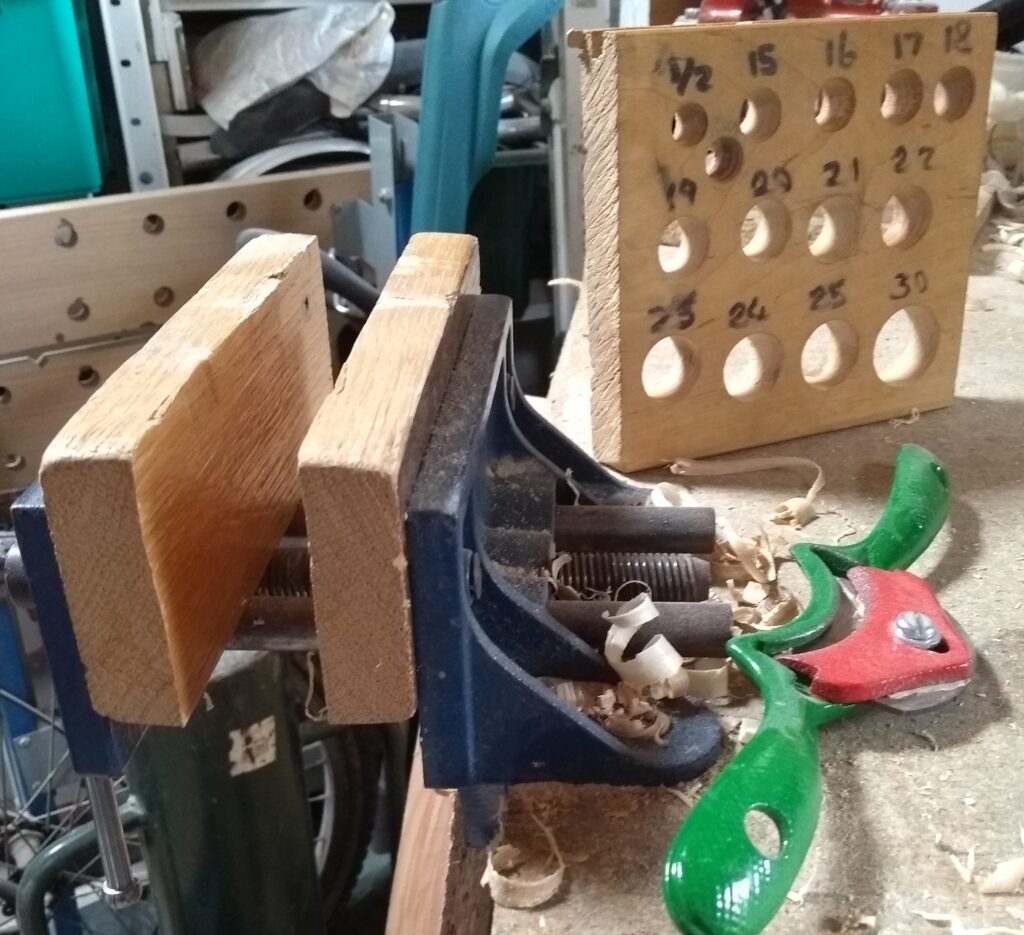
I have made furniture all my adult life and have also inherited my carpenter dad’s tools but, when you come to make chairs, you realise there is a whole different world of tools for that purpose. That can make it expensive when setting up, but you can get away with surprisingly little: an axe for splitting, a draw knife for shaping, a spokeshave for more detailed shaping, an external bevel gouge for seat carving, a mallet, a good saw, a flat chisel for wedges. A bodgers bench is enormously useful, but you can just about manage with a clamp on vice put on the edge of a bench, where you can move your tool round the wood easily. You will need the ability to drill mortice holes. If they are hidden mortices, as in many chair legs, the drill bits can’t have too long a lead point or it will poke out the other side. Once you have your basic tools, you can make or buy special ones as you go. I have a couple of mallets for splitting, made out of logs. Use your drill bits to make a series of holes in a nice piece of wood, so that you can check your tenon to mortice fit. If you make the same set of holes along a long straight piece of wood then cut it in half along its length, you will have a series of half holes that can be dropped onto a piece of wood in a lathe to check its size. I made some rounding planes for the tenons and just swapped a Veritas blade from one to the next in use, but I have found that leaving the tenons slightly oversized and then careful work with a concave spokeshave when it is dry, makes for a better fit overall. Get a good roll of lining paper to work out patterns for seats, rockers and bows.
I mentioned the bevel before and you will also need a square and protractor too. If you make a comb backed dining chair from a bought seat blank, then that should see you through. Add a few pieces of different, fine grade emery paper to sharpen edges (picked up from Robin Wood http://www.robin-wood.co.uk/) and you are away. Using a simple tool set allows you to play with the actual chair making without getting distracted too much by the less essential bits. After that you need lathes, more sophisticated cutting tools, steamers, planes, tenoners, rounding planes……
If we go through the actual making process, we can combine some hints and tips with the tools and tricks that I have found useful. Let’s start with the wood splitting. There are all sorts of tools available for this task alone but this raises one of the problems you will have – confusing terminology. When you start searching for wood or log splitting, you will mostly come across devices aimed at making firewood. This is opposite to your aim. In good wood, that is not too long, any axe will probably do the job. One that has straight, rather than concave, sides and is slightly wider at the thick end, will probably do the job a bit better. Although axes are made out of strong steel and have a thick side for hitting, they will last longer if you don’t hit them with a club hammer or other metal tool. That is where the log mallets come in. The books tell me that a froe is useful to control splitting, but, like many others, I have never mastered the technique. Mine is rarely used and even more rarely used satisfactorily. The use of the splitting axe at different points in the wood, as outlined earlier seems to work fine. It is worth mentioning again at this point, that you will want to give yourself some margin in the length of your pieces, especially if they are drying and showing a tendency to split at the ends. You can cut to length later.
After you have done the initial split the next rough shaping often uses a side axe. This is an axe that is not symmetrical, both in shape and in bevel, so that you can chop down the length of the wood without the axe skating off dangerously or digging too deep. Because it is asymmetrical it needs to be either left or right handed, unless you are usefully ambidextrous. Yo can make a side axe from a cheap standard axe by grinding the side down to flatten it. Some people use a carving axe, which is lighter and more controllable to achieve the same end. As I have made more chairs, I have used this part of the process less. Instead I try to split more accurately and more finely with the splitting axe and then use the draw knife to refine. I have a robust draw knife and find that letting it dig slightly deeper, then rocking it gently works like a froe to give a better controlled split. If it is digging too deep, turn the workpiece over and work from the other end. Using this method I tend to get a long, smooth, straight piece, without over-enthusiastic axe cuts in it and done quickly and efficiently. When I work alongside other people making chairs, I often find myself picking up pieces of wood that they have discarded, because they are nearer the desired end size without chipping away at them with hard to control tools.
Having mentioned the draw knife, it is worthwhile spending a little time looking at these tools. Essentially it is a very wide chisel, with handles at either end of the blade. By default it comes with one bevel, again like a chisel. If you use the flat side down it can either tend to skate over the wood or dig in deep. If you use a chisel bevel side down it will normally tend to turn out of the wood because your hand is behind the blade, so forward and downward pressure lifts the front up. This is not so true on a draw knife, because your hands are in front of the blade edge and you are pulling. For that reason many people use the draw knife with the flat side down. A subtle addition is a very slight, curved bevel on the flat side, which gives a nice level of control. Although the tool is designed to be pulled towards you, there is no reason not turn is over and use it in the opposite direction for short adjustment, where the grain changes direction. You have less control, so be careful. If I am wanting to remove larger amounts of material quickly, I use it bevel side down, which then helps with a rocking motion to split the wood as you go. Every single piece of wood is different and indeed every bit of every piece of wood. I have very skilful friends, who work with metal who dislike wood because it is so unpredictable. If you peek behind the chair on the cover photo you will see a metal sculpture of mine, so I know the joys and problems of both materials. With wood you have to know when to stop and move on to another tool or stage. Be prepared to stop using the draw knife while the going is good, no matter how hypnotic and relaxing it is.
Before I leave the draw knife it is worth saying a bit more about the bodgers bench. As you can see from the picture in the introduction, mine is very rough and ready. It has had a few minor rebuilds too, as I have developed a more subtle understanding of what works and as a result of a lot of wear and tear. You need somewhere to sit and the structure needs to be reasonably stable on whatever ground you put it. You will often be sat on the seat with your legs up on the swinging arm, so you will not be surprised by now that there are triangles involved, one widening down from the sitting point and one from the front to the back. Having just three points of contact with the ground makes it easier to get it stable on uneven ground. If you are adventurous, you might like to make your seat a carved one. When you are sat on the seat you need to be able to extend your legs to the end of the swing arm movement with ease. If very different sized people are using is, you may need to make the seat moveable, otherwise it needs to be a reasonable compromise size. The gap between the table, where the workpiece sits, and the clamping jaw really needs to be variable by more than is given by the swing arm movement. Allowing the table to tilt, mine is hinged at the far end, by putting a piece of wood under, is an easy way of doing this. If you look again at mine you will see that the swinging arm is attached by a wooden pin and that there are multiple holes in it, allowing a wide range of adjustment. This is useful, for making a log mallet for instance. The other design tip is to make the table narrow towards the front end. This allows you to angle the draw knife downwards more easily, to round the piece and to do this with the piece at various angles across the table. That flexibility of the angle of the stick in the clamp is also useful for sticks with varying thicknesses, as in the picture at the head of this paragraph. For this reason I also now prefer that the clamping piece of wood does not have a groove in the middle, as some designs do.
Next in subtlety for shaving sticks is the spokeshave. The blade is much smaller than a draw knife and, in most modern versions, it is clamped in a metal double handled holder. The one in the picture above, next to the clamp-on vice and the hole tenon size checker, is a concave bladed version. The spokeshave can be pulled or pushed. They are wonderful devices, especially if sharpened well. Like a plane, the shaving being created has to rise away from the blade and go through a slot to clear the work and thus has a tendency to jam. The finer you can set your blade, the better it will be. You may still need to change direction to go with the wood layer directions and there may come a point where it is better to stop, let the sticks dry out and then fine tune.
In writing this I nearly ignored the pole-lathe all together, but that would be unfair. My friend Stephen and I have developed an understanding and he quietly goes away and uses mine, if he wants turned sticks or legs. Making chairs in New Zealand or Westonbirt Woodworks, I have used the pole-lathe occasionally and my competence sometimes takes people by surprise. I just like the simplicity and challenge of doing the job without one. The first important thing about the pole-lathe is the preparation work before you step up to it. You need to keep checking the stick you are preparing by looking down it to make it straight. Place it on a flat surface and roll it round to double check. Take it down to only slightly thicker than you want the widest piece of your stick to be, so that you are not stuck on one leg pumping away for too long. Make sure that your centres are where you want them to be, especially if you are practising deviant behaviour, like leaving some of the bark on. When you have it in the lathe, run something, such as a piece of shaving, along the tool rest to check all this before you start waving sharp tools at the piece. On the commonest, bungy cord type of lathe, try to make the cord that wraps round the stick as vertical as possible and as central as possible to the lathe and this tend to ensure that you are not constantly having to untangle it or move it out of your way. As it turns, you can move the cord back or forth along the piece by lightly tapping the cord away from the coil round the the stick, so tapping above the stick takes it one way and below the stick the other. I am strongly left-handed but I have found that the pole-lathe is one of the tools where it is of little importance, so I often use one set up for a right-hander. If you are making your own treadle, then a long reach on it gives more turn per kick, which it important if you are doing pieces with wider diameters. Richard Hare simply ties the moving part of the treadle to the board you stand on and that seems to work very well and saves a lot of messing around with strained hinges.
Once you have made all the legs, stretchers and other sticks, you need to dry them out. I mentioned earlier that you don’t need to build a kiln with a fire underneath for this. I have just checked the cupboard under the stairs, mentioned earlier, and the cupboard with the heating boiler both seem to have humidity levels of around 50%, which is lower than our Yorkshire, unheated property at the moment in late Spring. In summer they have levels of around twenty percent. That seems to be enough to dry the wood reasonably quickly.
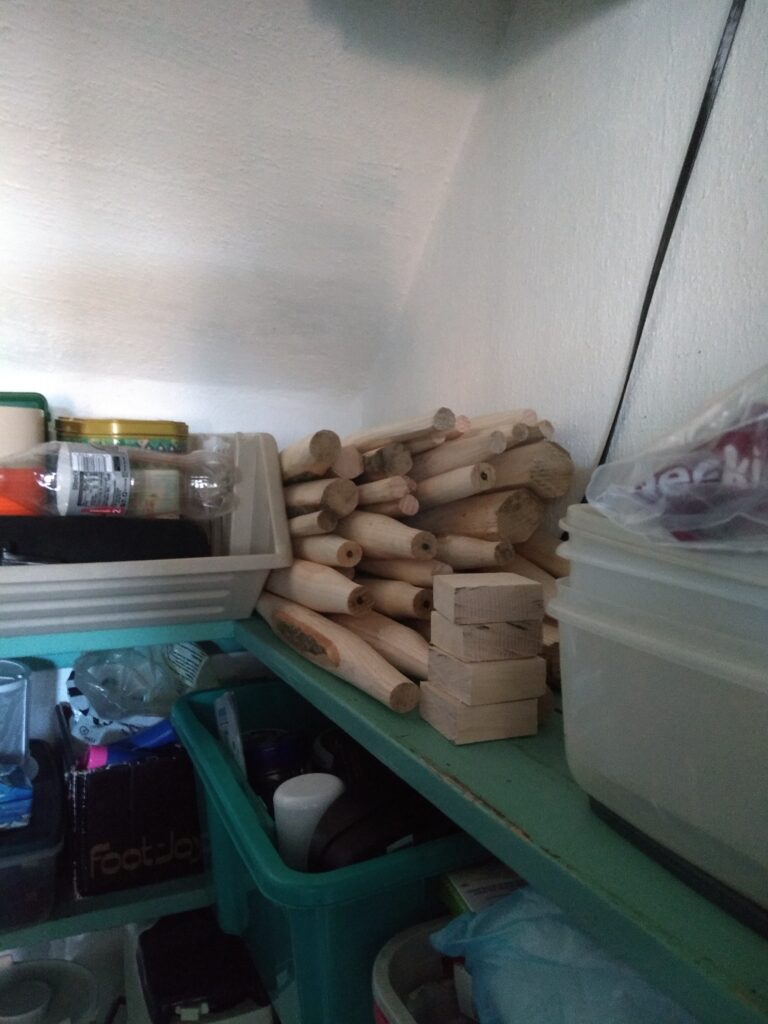
If you want to speed it up you could build a box with a rack over a bulb that gives off some heat. There is a picture of Richard Hare’s box below.
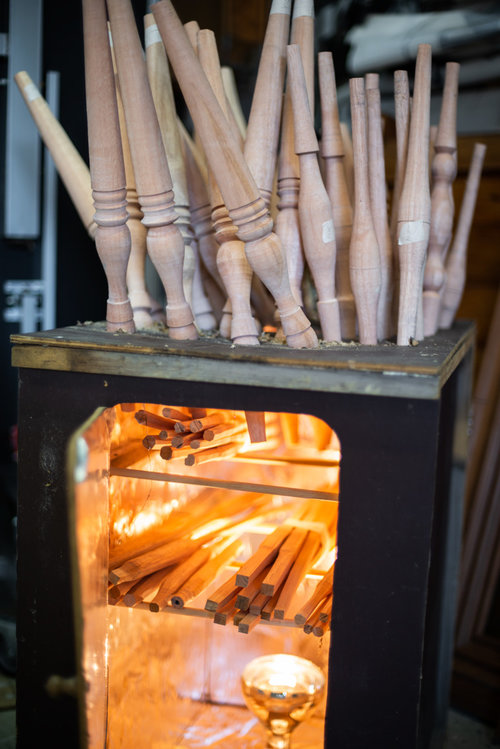
There is nothing for it now that you have put your sticks in to dry, you are going to have to start work on the seat. Before you go any further think about drilling the holes for the sticks. If you are starting with a nice flat seat blank it is much easier to experiment with angles and positioning before you remove the flat surface. I’ll write about the holes and angles later but pause before hacking away. To remove wood from the seat the tools I have used are long and short handled adzes, draw knife, gouge, scorp, travisher, spokeshaves, a pullshave, rasps, scrapers, small planes, sandpaper. As age has started to get to me, I have also tried a rotating sanding disc in a drill and an electric sander, but they are horrible, if useful. I have never really been happy with the adze and find I am just as quick with a gouge and mallet. All the rest seem to work better or worse on different bits of the same piece of wood and in different direction relative to the grain. Because I have problems with both my hands, I find the pullshave very effective. To use any of these you need to clamp the seat effectively. At home I have a bench with holes in and I use wooden plugs in the holes and a bench hold-down. To work on the edges I use a vice and I also have the luxury of being able to use the hold-down sideways to clamp both ends of the seat. Use whatever makes the seat stable and at the right height for you to work. If needs be stand on a box. If you want a neat edge on the seat bowl, then working round it carefully with a carving gouge, before removing more wood, is useful. Finally, a sharp rounded scraper is a wondrous thing.
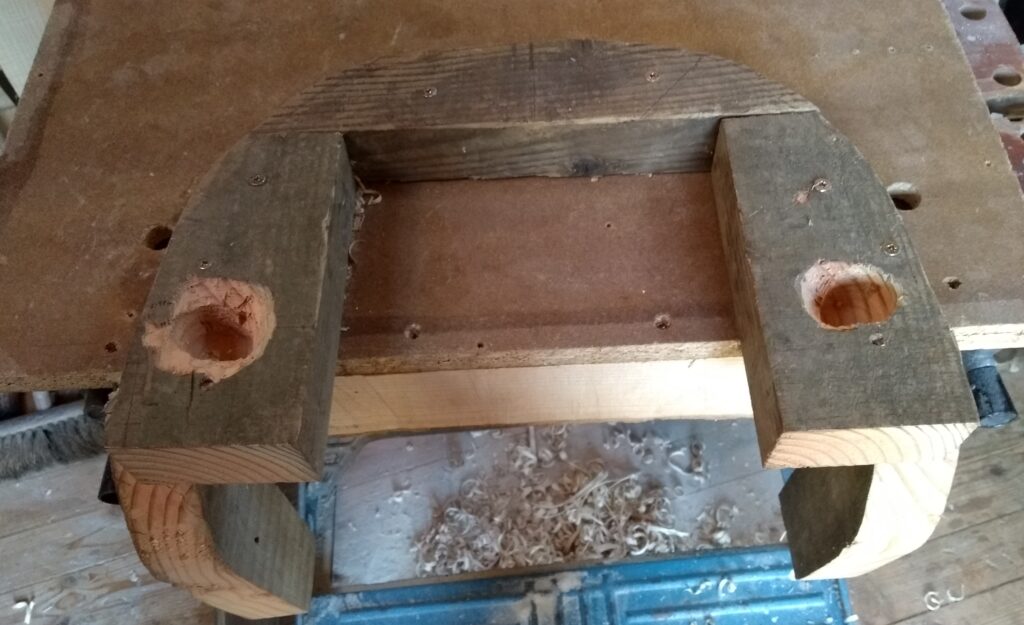
The other thing you can work on, while your legs and other bits dry, is the steam bending of combs and bows. Here I will just add a bit about former jigs, to what I said earlier. There seem to be two main kinds. In the one shown before, you have two pieces of wood shaped to form the inside and outside of the curve and you squeeze the wood between them. This method is especially useful for combs. I have had little problem with this method, apart from one large, particularly stubborn, comb in New Zealand which gave in to our will in the end. In the second type aboce, there is just an inner former and you use a strap to hold the outside of the wood as you bend it round the former. The wood is then held in place against the former using either pegs or clamps. This is the normal method for bows. Typical of me, my formers were made of whatever I had to hand, so the full curve of a bow former is made up of three separate pieces attached to a board. The one here is the more complicated double one for the double bend shown before. I will highlight for you some of the problems I have found with this method. If you use pegs in the board to hold the piece, then you can’t really vary the depth of the piece, as the peg will either not go in the hole (which has to be fairly deep for stability) or will leave the piece able to move away from the former. If you use clamps, you need to make sure you can put them where the ends are parallel. If there is any slope on the ends, the pressure of the piece trying to straighten will slide them till they come loose. A hole in the former, big enough to house the end of the clamp, is one way of reducing this risk. You need the former to be stable while you bend, so a piece of wood attached underneath that will clamp in a front vice is useful. Finally I would recommend that the curves you bend are reasonably gentle and continuous, as sharper bends seem to have more tendency to fail and that you build your former to over bend a little to allow for some later straightening on release. This is more important for arm bows that will not be held in place at the ends in the same way as back bows. Steam bending can be very stressful while you are doing it, but it is a wonderful feeling when it works. All I can say about the double bend is that it gave me a headache trying to figure out the former and it failed first time, from a dwindling stock of half suitable wood, but it definitely merited a fist pump when it worked.
We now come to the exciting bit, which is Framing. We need to go back to angles, drilling holes and putting chairs together. As I outlined earlier, the angles are hard and this is made worse by the fact that each piece of wood you work on ends up not entirely true. On the plus side the wood is also fairly good at adapting to slight changes in position and shape, especially longer back sticks and bows. Unless you are incredibly meticulous, you will make mistakes though, so here are some tactics to help you through. Most chair makers tend to put that central stick at the back of the seat. That is not for looks and it is certainly not for comfort, as two separated central sticks might be more comfortable for the spine. The central stick is to give you a point to measure everything else against. Once it is in place you can put a bow or two on to it and move them around to see how well the whole thing works. To put in a central stick you need to decide where the centre is. Symmetry is not everything in chairs, but deviations from it need to thought about and controlled, so a good centre line, top and bottom, helps a great deal. Before this gets any more complicated, it is worth reminding you of the seat patterns I mentioned earlier. I use both the paper and the fibreboard ones at different times. They are certainly useful if you want to be able to repeat a design, even with variations. Using the patterns, you can work out your angles without drawing all over your seat. If your seat ends up slightly different to the original pattern because of enthusiastic cutting or shaping, you can draw round it on a new piece of lining paper and check that all the angles still work. You can put the pattern flat on a bench and use the bevel to try things out visually.
When it comes down to it though, you are going to have to drill a hole at some time. The most likely thing that will happen is that you have the hole at slightly the wrong angle. You will put four legs in and one of them obviously doesn’t look right. While it is still in the hole, carefully work out what you have done wrong and draw on the seat what the correct line or angle is. Remove the leg and plug the hole with some spare stick timber. Unless it is very far out, I just fit and knock the plug in without glue. Re-drill correctly and refit. If it works, then you will have a perfectly shaped curved wedge of plug in the hole. If you are sure you now have it right, you can glue that wedge in after removing the leg. The next most likely thing to happen is that you have drilled the hole in the wrong place. A plug is the correct solution again, but now you have more of an aesthetic decision about how much effort you want to put into disguising your mistake. I think honesty is the best policy. As I have heard said many times, it is all part of the story of the chair. On smaller parts, plugging is more likely to compromise strength and is thus less satisfactory. If you prefer conceit to honesty, then you can use paint to conceal it. There are some very stylish chairs using a covering of Milk Paint.
Hopefully you now have all the bits to put you chair together. I advised leaving your tenons slightly oversized earlier and now is the time to start bringing them down to fit. Don’t rush this. Take the end of the tenon down to size on all the bits and put the chair, or a particular assembly (undercarriage, back, arms..) together to get first look at the shapes. As you bring the tenon down to size, it is possible to alter the angle and placement relative to the stick slightly. Even small adjustment can make the resulting chair alter shape slightly and become more solid in fit. Keep working at it and remember that adjusting one side of the chair can alter the other side. If you have more spare wood on one tenon, it may be the one to adjust, rather than the most obvious one.
Unless you are a far better craftspeson than I am, you will have to build the chair and knock it apart and adjust quite a few times till you have got it right.
Elsewhere I have mentioned that the angles often mean that joints tighten as you knock them together, so knocking the legs into the seat moves the legs inwards and thus tightens the stretchers. Unfortunately the opposite is true when the angles are reversed. So as you knock the legs into a rocker, in effect you start to widen the gap between the legs. The same is true for a stick top at the opposite end to a seat, for instance into the underneath of an arm bow, or even a back comb. If you can it is best to put the legs or sticks into the end with the widening effect first and the squeeze it all up with the other end. It is complicated but you can use this tension to make the structure more stable even without glue.
If all that makes this process even more worrying just remember that it is far easier to put any problems right now than it will be if you spot them after you have glued it all up. Patience here is the most important part. Keep walking round it and looking at is carefully. Keep checking your assumptions. Whatever addage you’ve heard in terms of multiple checks, add a few more. I have a rocking chair here that am not completely happy with the leg length and angles on and I am still putting off trying to adjust it.
Once you have it ready or very close, I suggest adding a first coat of whatever you intend to finish the chair with to all the parts that will still show after fitting together. In this way any excess glue can be more easily wiped off without soaking into the hungry wood.
That is all I can think to say except to talk in a little more detail about some of the chairs I have made on another page. I hope you have as much fun with the process as I have.
