Since I started with Shelley Art Group I have tried to make a habit of writing up any learning sessions we do. I’ve just realised that an early one on with, Heather Burton, using these knives slipped out of my brain. As I now use these tools on most of my acrylic painting I thought I should correct that.
At the workshop I just felt out of control throughout but there was something about the freedom of it and the way it created interesting textures that made me persist. Here’s one I created just after the workshop:
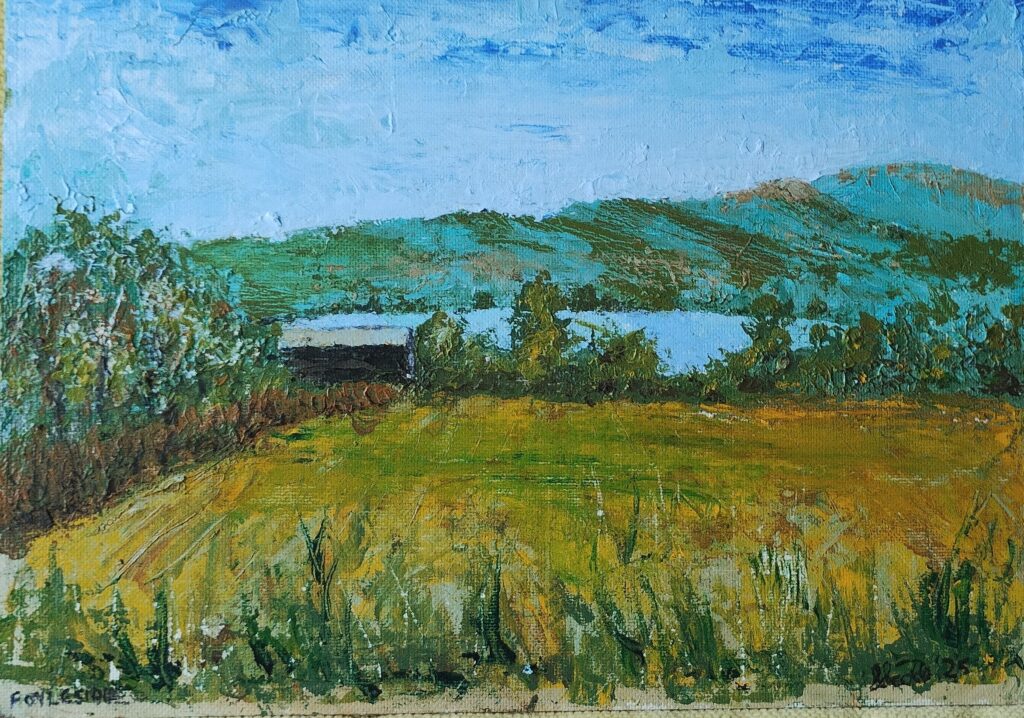
I based it on a sketch I did some years ago and it was successful enough to hang in the farm and to encourage me onwards.
One of the other members at the workshop (Julie) persisted as well and I ended up buying a painting she made. Her descriptions of some of what she’d found added to my store of knowledge. I experimented a bit more and decided to go on a workshop at Heather’s house. Here’s what came out of that (with a lot of work afterwards too):
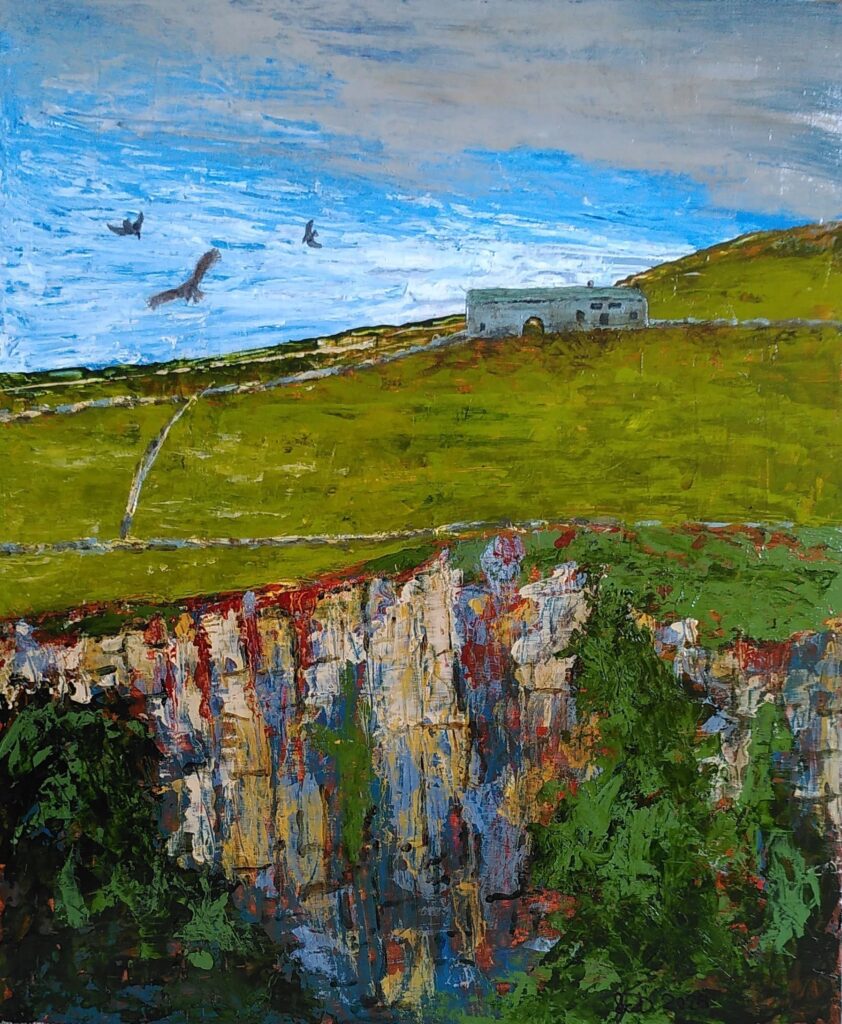
Hopefully you can see that the skills have come on somewhat. Here is a fragment of another.
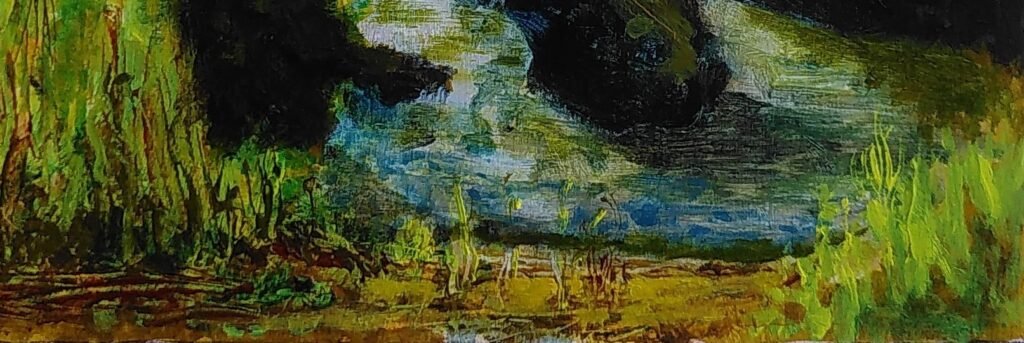
That fragment shows the sort of textures, lively colouring and sense of life and movement the pallet knives can give you. You don’t have to use the knife for everything but it is a really useful tool. This post explains some of the techniques, hints and tips for success.
The first tip I picked up from Julie was to make sure you make a good base surface before you start. You can use a heavy paper or board or canvas but also make sure you give it a good gesso base coat as well.
Like me you may associate pallet knives with thick paint layers. You can try this but, like Heather, I recommend that you start with flat layers. If you leave raised or ridged areas it makes subsequent layers much harder to apply. You can layer paintings in a quite traditional way even with the knives.
Related to the thin layers is the fact that you can scrape paint off as well as put it on. If you make what you think is a mistake scrape it off. Don’t worry if it doesn’t all come off. You will have the most success if you embrace freedom and experiment. If you are used to very neat layers of paint you can let the paint dry and paint over but my next tip means that you don’t have to do that.
Instead of mixing exactly the colour you want and laying it on carefully on the canvas or as a thin semi transparent layer over another colour, you can part mix the colour on the pallet and then play with the mix on the painting. You can scrape areas out with the edge of the knife to create lines of colour variation. Look at the fragment and I think you see evidence of some of this.
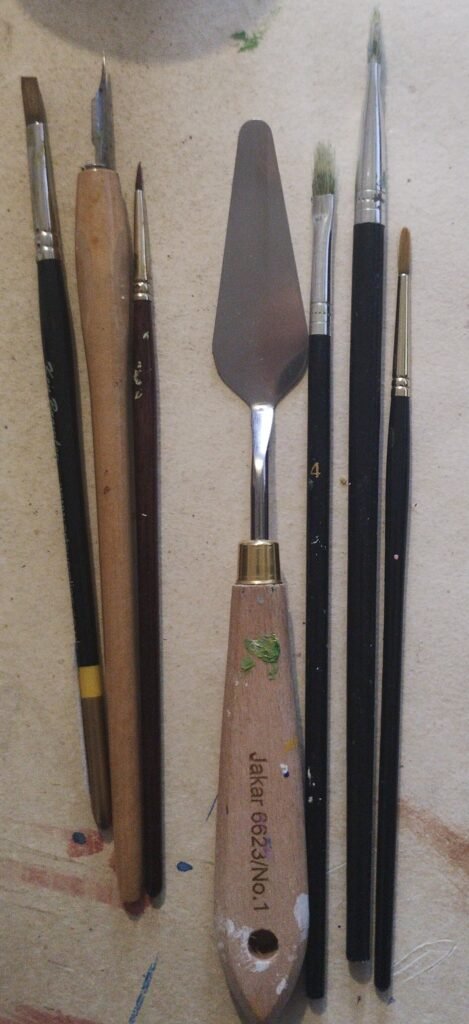
Less a thicker bristle brush, the picture above show the tools on my desk from a painting I recently completed. The dip pen is for thin acrylic ink marks.You don’t have to stick to one tool. I might apply paint with a knife and then decide a bit more subtle merging is required and so. go over it with a dry brush. Or you can do it with a damp brush to get a smoother effect. Forget the rules and experiment. The pallet knife above is part of a cheap set. They need to be flexible. I have bought a couple of slightly more specialist ones but I don’t use them much. I have usd edges of card to make thinner marks too. Make sure you have old cloths at hand. One of the lovely advantages of pallet knives is that you can simply wipe them clean, though I usually see if any spare paint mix can be used elsewhere on the painting as well.
When applying the paint, pick some up with the knife and apply it to the surface edge first and then drag across, slowly flattening the knife to apply more paint as you go. Don’t worry too much about it. You can pick/scrape paint up if there is too much. Remember you want to leave a fairly flat surface at first so pick up ridges in particular unless they are an intended part of the final painting.
Look at the quarry in the Digley Airshow above. Heather suggested making the marks vertically and that has worked. Any texture in the paint aligns with the nature of the object you are creating and gives a more marked contrast to any marks in a different direction.
As Heather just replied to me, remember not to give up. As I wrote in another post, you have permission to play. Keep going and I think you will find a freedom and a range of techniques that work for you.
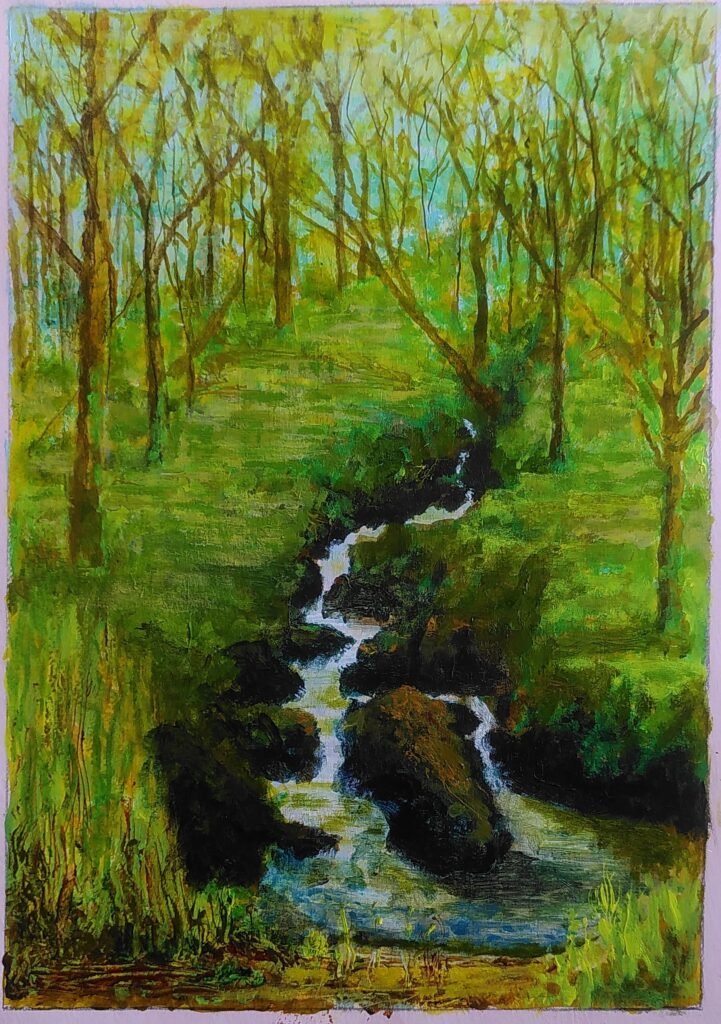
The full Wood of Cree painting using the illustrated tools:
That’s it for the moment. My ageing brain is shouting at me to stop. I’ll come back for more another time.